Product Photography Without a Studio: A Practical Setup
Capture dependable source photos with a phone, window light and simple materials, then decide which scenes AI can safely add.
By CREATR editorial team · Published · Updated
What do you need for a temporary product-photo setup?
This guide covers a temporary setup for small products. Larger items, jewelry, transparent objects and accurate on-body fit can require a different arrangement. It is reasonable to hire a photographer for those products while doing straightforward catalog work yourself.
Use a table near a window, with room to move the product and camera. Switch off nearby lights if their color differs from the daylight. A white card can act as a background or reflect light into the shadow side. Keep a second card available to block an unwanted reflection. Choose a position you can use safely without balancing the phone on an unstable object.
Clean the item before shooting. Dust, fingerprints and damaged packaging consume retouching time and can confuse product review later. Photograph the actual variant you intend to sell. A source image of a similar model creates the wrong reference for every subsequent step.
| Problem in the test image | Try this change first | What to inspect |
|---|---|---|
| One side is too dark | Move a white reflector card toward that side | Shape remains visible without flattening every shadow |
| Bright glare hides the label | Rotate the product or change the camera/light angle | The printed area becomes readable |
| Edges disappear into the background | Change background tone or separation | The full outline is distinguishable |
| Image is soft | Stabilize the phone and retake with adequate light | Fine detail is sharp before any AI processing |
| Color varies between frames | Keep the light source and camera settings consistent | The physical item remains the reference |
How should you capture the first source photo?
- Clean the lens and arrange the product upright in its intended orientation.
- Use the normal camera view as a starting point. Avoid placing the phone so close that the perspective exaggerates one part of the item.
- Tap the product to focus. If your camera offers exposure or focus lock, use it when making a sequence under the same light.
- Take a test and inspect it at full size. Look at the label, fine edges and the part of the product farthest from the camera.
- Move the product or camera deliberately for additional required views, keeping the capture arrangement consistent.
These are starting recommendations rather than universal camera settings. Phone cameras and products differ. If the front is sharp and the rear is blurred, increase camera distance and reconsider the angle before trying to repair the image with software. If glare obscures text, reposition the light or item; a generated scene cannot provide dependable evidence of the hidden lettering.
Which views should you make before removing the setup?
For an illustrative zippered pouch, make a closed front view, a back view, an open view showing its compartments and a close view of the fastening. Add a scale reference whose relationship to the item is accurate. For a bottle, the required set may instead include front and back labels, the closure and the actual contents or packaging supplied.
Check your shot list against the product description. If the listing promises a particular connector, compartment or finish, the image set should make that feature understandable. Photograph a detail that matters rather than inventing another angle to increase the image count.
Keep the original files. Name them by SKU, variant and view before creating derivatives. This makes later corrections possible without repeating the capture session or accidentally substituting another product’s source.
What should AI change after the capture?
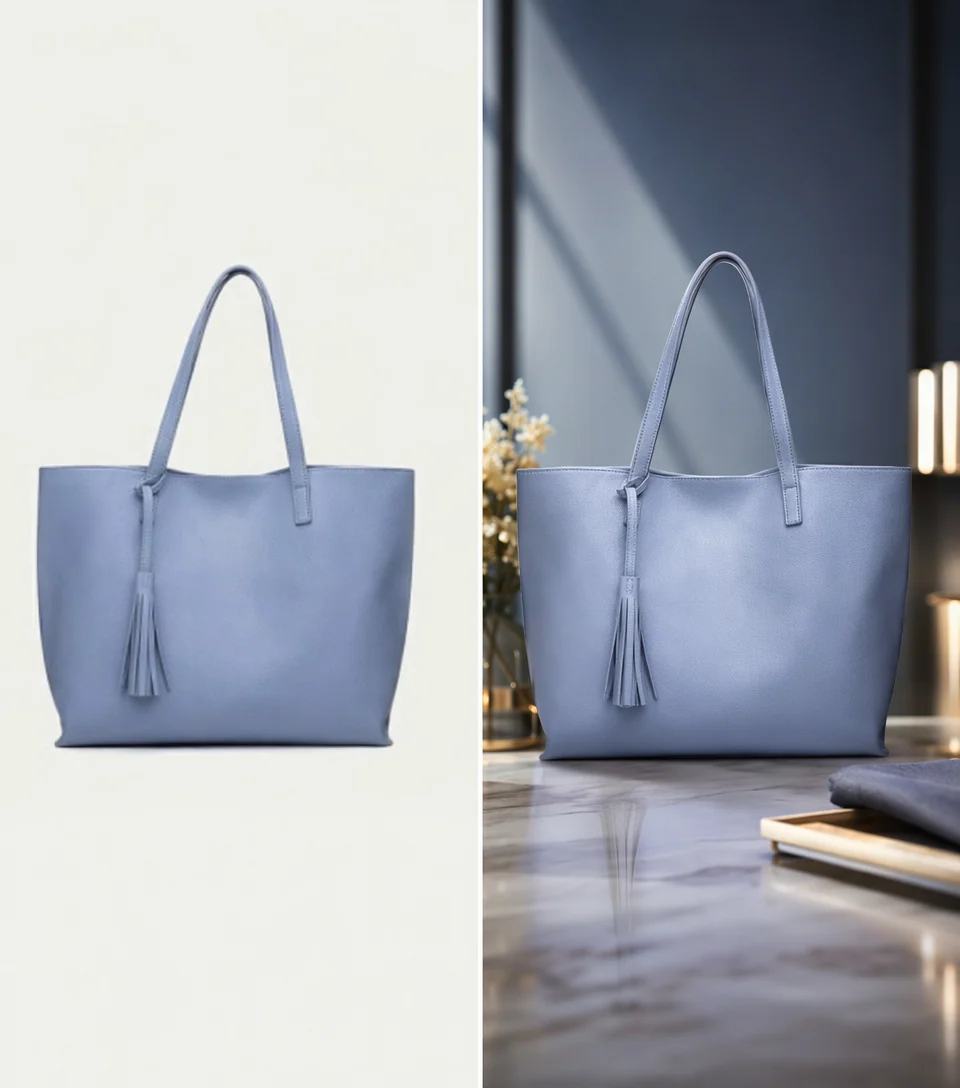
An illustrative brief for a pouch could say: “Place the supplied closed pouch on a neutral travel-planning surface. Preserve its zipper, stitching, shape, material and color. Keep the entire item visible. Add no text or extra compartments.” The brief states what must stay fixed as well as what can change.
If the generated result changes the construction, reject it even when the scene is attractive. A pouch with an invented pocket tells a customer the wrong thing. If the task is only to simplify the background, consider a controlled cutout or editing workflow before asking a generative tool to recreate the entire scene.
Compare the result at the final display size. Check contact shadows, product boundaries and the distinction between the item and surrounding props. Use the before-and-after review gallery for more specific comparison points.
How do you prepare the images for the store?
Shopify’s product-media documentation recommends consistent aspect ratios for featured images displayed together. Apply that decision to a group of products rather than stretching each photo to a different shape. Leave enough breathing room for the theme’s card crop.
For shopping feeds, read Google Merchant Center’s image requirements before adding promotional graphics or lifestyle props. The approved image should represent the exact item and the intended image role.
A temporary setup is a poor fit when you cannot control reflections, reproduce important color or demonstrate the product safely. Do not spend indefinitely correcting those issues through generation. Use a more controlled capture method, and keep this setup for the products it handles reliably. For a dedicated repeatable corner, continue with the home product-photo workflow.
Frequently asked questions
Do I need a lightbox?
Not necessarily. Try a stable camera and manageable window light first. A lightbox can help some small products but can also create reflections that need adjustment. Buy it to solve an observed capture problem.
Can AI fix a blurred or cropped source?
It may create a plausible-looking result, but that does not recover dependable evidence of the missing product detail. Retake the source when the needed area is blurred, hidden or outside the frame.
When should I stop doing the shoot myself?
Use specialist capture when product detail, reflections, fit, accurate color or a demonstration exceeds what your setup can show reliably. Compare the full correction effort with the cost of controlled photography.
Tools for this workflow
- AI Product Photography: Create studio and lifestyle images from an approved product photo.
- Image Enhancement: Crop, enhance, and prepare an approved image for its destination.
- Product Photo Packs: Build a coordinated image set for a listing or product launch.